总结一下react项目中redux的基本使用方法,顺便将其与vuex稍作对比学习,前端路漫漫

做一个面包屑title跟随菜单栏名称变换的功能
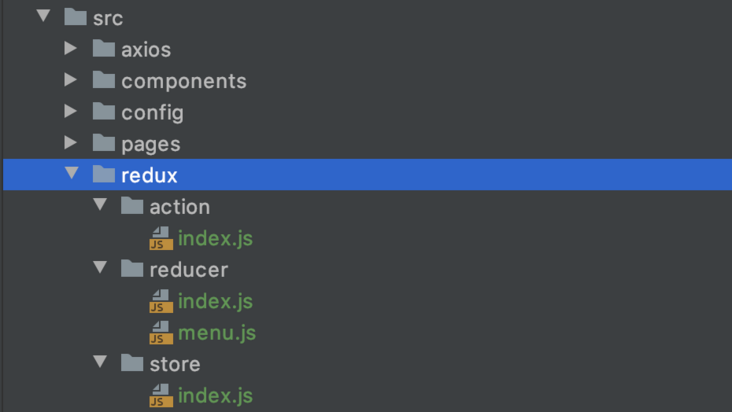
1.定义目录

2.定义reducer

redux中的reducer类比vuex的mutations,都是更改state,不同点在于redux需要将新的state返回,vuex不需要,多个reducer可以分多个js文件,然后在index.js中通过combineReducers将reducer合并,类似vuex的Modules,实例代码:

1
2
3
4
5
6
7
8
9
// reducer/index.js

import { combineReducers } from 'redux'
import menu from './menu' // 引入单独的reducer子模块
export default combineReducers({
menu,
// 可以继续添加其他的reducer模块
})

注意,模块化后,组件中获取state的值的时候,需要从对应的模块里去取,例如:state.menu.menuName

1
2
3
4
5
6
7
8
9
10
11
12
13
14
15
16
17
18
19
20
// reducer/menu.js

import { type } from '../action';

const initialState = {
menuName: '首页' // 初始化一个menuName的值
};
export default (state = initialState, action) => {
switch (action.type) {
case type.SWITCH_MENU:
return {
...state, // 需要将之前的state解构出来一起返回
menuName: action.menuName // 更新新的数据返回
};
break;
default:
return {...state};
}
}

3.定义action

redux的action,是定义需要调用那个reducer,主要是根据type字段,对应reducer的action.type,同时也可以传递一些参数,跟vuex的action一样,提交的是一个mutation(reducer),通过mutation(reducer)去改变state的值,实例代码:

1
2
3
4
5
6
7
8
9
10
11
12
13
// action/index.js

export const type = { // 统一管理所有的事件类型,方便项目整体的维护
SWITCH_MENU : 'SWITCH_MENU'
};

export function switchMenu(menuName) { //具体的某一个action方法,用于改变某一个state的值
return {
type: type.SWITCH_MENU,
menuName
}
}

4.定义store

1
2
3
4
5
6
import { createStore } from "redux";
import reducer from '../reducer';
import { composeWithDevTools } from 'redux-devtools-extension'; //chrome调试工具

export default () => createStore(reducer,composeWithDevTools())

5.配置项目入口文件

1
2
3
4
5
6
7
8
9
10
11
import { Provider } from "react-redux"; // redux提供的高阶组件,高阶组件类似vue中的mixin
import store from './redux/store';

ReactDOM.render(
// 将store传入Provider,目的是使项目全局都能拿到store,将其作用域提升到全局
<Provider store={store()}>
<Router />
</Provider>,
document.getElementById('root')
);

6.组件中获取state的值

每个用到redux的页面或者组件都需要使用redux的Api导出组件

1
2
3
4
5
import { connect } from 'react-redux'; // 可以理解其表面意思,将其组件和redux连接起来

// 中间省略一万字...

export default connect(mapStateToProps,null)(Header)

connect方法返回一个方法,返回的方法的参数里传入当前需要使用到redux的类组件或者说函数组件,connect方法第一个参数是mapStateToProps,这个回调方法用于获取state的值,connect回调回来会给mapStateToProps方法把state传过来;
第二个参数是mapDispatchToProps,用于dispath一个action,跟vuex的套路差不多,同样,connect方法回调的时候会把dispath方法回调传进来。
两个参数非必传,用到哪个传哪个,没用到可以传null;
还有一个重要的概念就是,这两个回调必须有返回,可想而知,接收state的肯定要返回一个state,提交action方法的肯定要返回一个用于提交action,改变state的方法;返回值需要从this.props中获取
实例代码如下:

1
2
3
4
5
6
7
8
9
10
11
12
13
14
15
16
17
18
19
20
21
22
23
24
25
26
27
28
29
30
31
32
33
34
35
36
37
38
39
40
41
42
43
44
45
46
47
48
49
50
51
52
53
54
55
56
57
58
59
60
61
62
63
import React, {Component} from 'react';
import { Row, Col } from "antd";
import './index.less';
import { dates } from '../../utils';
import { connect } from 'react-redux';

class Header extends Component {

componentWillMount() {
this.setState({
userName: '小聪忙'
})
let timer = setInterval(() => {
let sysTime = dates.formatDate(Date.now());
this.setState({
sysTime
})
},1000)
this.setState({
timer
})
}

componentWillUnmount() {
this.setState({
timer: null
})
}

// 当前title的值从this.props.menuName中获取
render() {
return (
<div className="header">
<Row className="header-top">
<Col span="24">
<span>欢迎,{this.state.userName}</span>
<a href="#">退出</a>
</Col>
</Row>
<Row className="breadcrumb">
<Col span="4" className="breadcrumb-title">
{this.props.menuName}
</Col>
<Col span="20" className="weather">
<span className="date">{this.state.sysTime}</span>
<span className="weather-detail">晴转多云</span>
</Col>
</Row>
</div>
);
}
}

//定义一个用于接收state里某个值的回调函数,必须有返回值,才能从props中获取到这个值
const mapStateToProps = state => {
return {
// 特别注意,使用过vuex模块化开发的就应该知道,获取state的值的时候也需要从对应的模块中去获取
menuName: state.menu.menuName
}
};

export default connect(mapStateToProps,null)(Header)

7.改变state的值

1
2
3
4
5
6
7
8
9
10
11
12
13
14
15
16
17
18
19
20
21
22
23
24
25
26
27
28
29
30
31
32
33
34
35
36
37
38
39
40
41
42
43
44
45
46
47
48
49
50
51
52
53
54
55
56
57
58
59
60
61
62
63
64
import React, {Component} from 'react';
import './index.less';
import { Menu } from 'antd';
import menuConfig from '../../config/menuConfig';
import { NavLink } from "react-router-dom";
import { connect } from 'react-redux';
import { switchMenu } from '../../redux/action';

const { SubMenu } = Menu;

class NavLeft extends Component {
componentWillMount() {
const menuTreeNode = this.renderMenu(menuConfig);
this.setState({
menuTreeNode
})
}

renderMenu = (menuConfig) => {
return menuConfig.map((item,index) => {
if (item.children && item.children.length) {
return (
<SubMenu title={item.title} key={item.key} onClick={this.handleClick}>
{this.renderMenu(item.children)}
</SubMenu>
)
}
return (
<Menu.Item title={item.title} key={item.key}>
<NavLink to={item.key}>
{item.title}
</NavLink>
</Menu.Item>
)
})
}

// this.props中获取mapDispatchToProps回调返回的方法

render() {
const { handleClick } = this.props;
return (
<div>
<div className="logo">
<img src="/assets/logo-ant.svg" alt=""/>
<h1>Imooc ms</h1>
</div>
<Menu theme="dark" onClick={handleClick.bind(this)}>
{this.state.menuTreeNode}
</Menu>
</div>
);
}
}

// 回调接收两个参数,第一个是dispath方法,第二个是`ownProps`,它代表组件本身的props,如果写了第二个参数`ownProps`,那么当`prop`发生变化的时候,`mapStateToProps`也会被调用
const mapDispatchToProps = (dispatch, ownProps) => {
return {
handleClick: ({item}) => dispatch(switchMenu(item.props.title))
}
}

export default connect(null,mapDispatchToProps)(NavLeft);

最终效果图: